
Hearing a squeal when braking or feeling vibrations could be a sign that it’s time to replace your vehicle’s rotors and brake pads. This article will guide you through each step to replace Rotors and Brake Pads, identify when replacements are necessary, and tackle common challenges you might face — all aimed at ensuring your safe braking. You’ll learn practical tips for DIY repairs and preventative maintenance to help you save on costs without skimping on safety.
Shop for the products in this blog
Key Takeaways
Regular maintenance of the brake system, including replacing brake pads and rotors when they show wear symptoms, is crucial for vehicle safety and optimal braking performance.
Understanding the indications of brake wear, such as noise, poor performance, and visual wear, can prevent further damage and costly repairs.
Quality brake components and proper maintenance practices, including regular inspections and adopting good driving habits, can extend the lifespan of brake systems and save money in the long run.
Understanding Brake Systems
Imagine applying your vehicle’s brakes, and instead of a smooth stop, you experience a jittery halt. Or worse, no halt at all. This underscores the need to comprehend your vehicle’s brake system. The brake system, comprising of the brake https://stg-mycarrepairmultisite-staging.kinsta.cloud/uk/blog/tutorials/your-essential-guide-how-to-check-brake-pads-for-safety-and-performance/pads, brake rotors, and brake fluid, works together to ensure your vehicle responds every time you step on the brake pedal.
As brake pads transform kinetic energy into thermal energy during braking, their regular replacement is key to maintaining optimal brake system performance. Conversely, brake fluid is a crucial hydraulic fluid transforming force into pressure, halting a vehicle upon brake engagement. It operates based on Pascal’s law, ensuring even application of brake force. It also serves multiple purposes, including preventing rust and corrosion, due to its ability to absorb moisture.
Disc Brakes
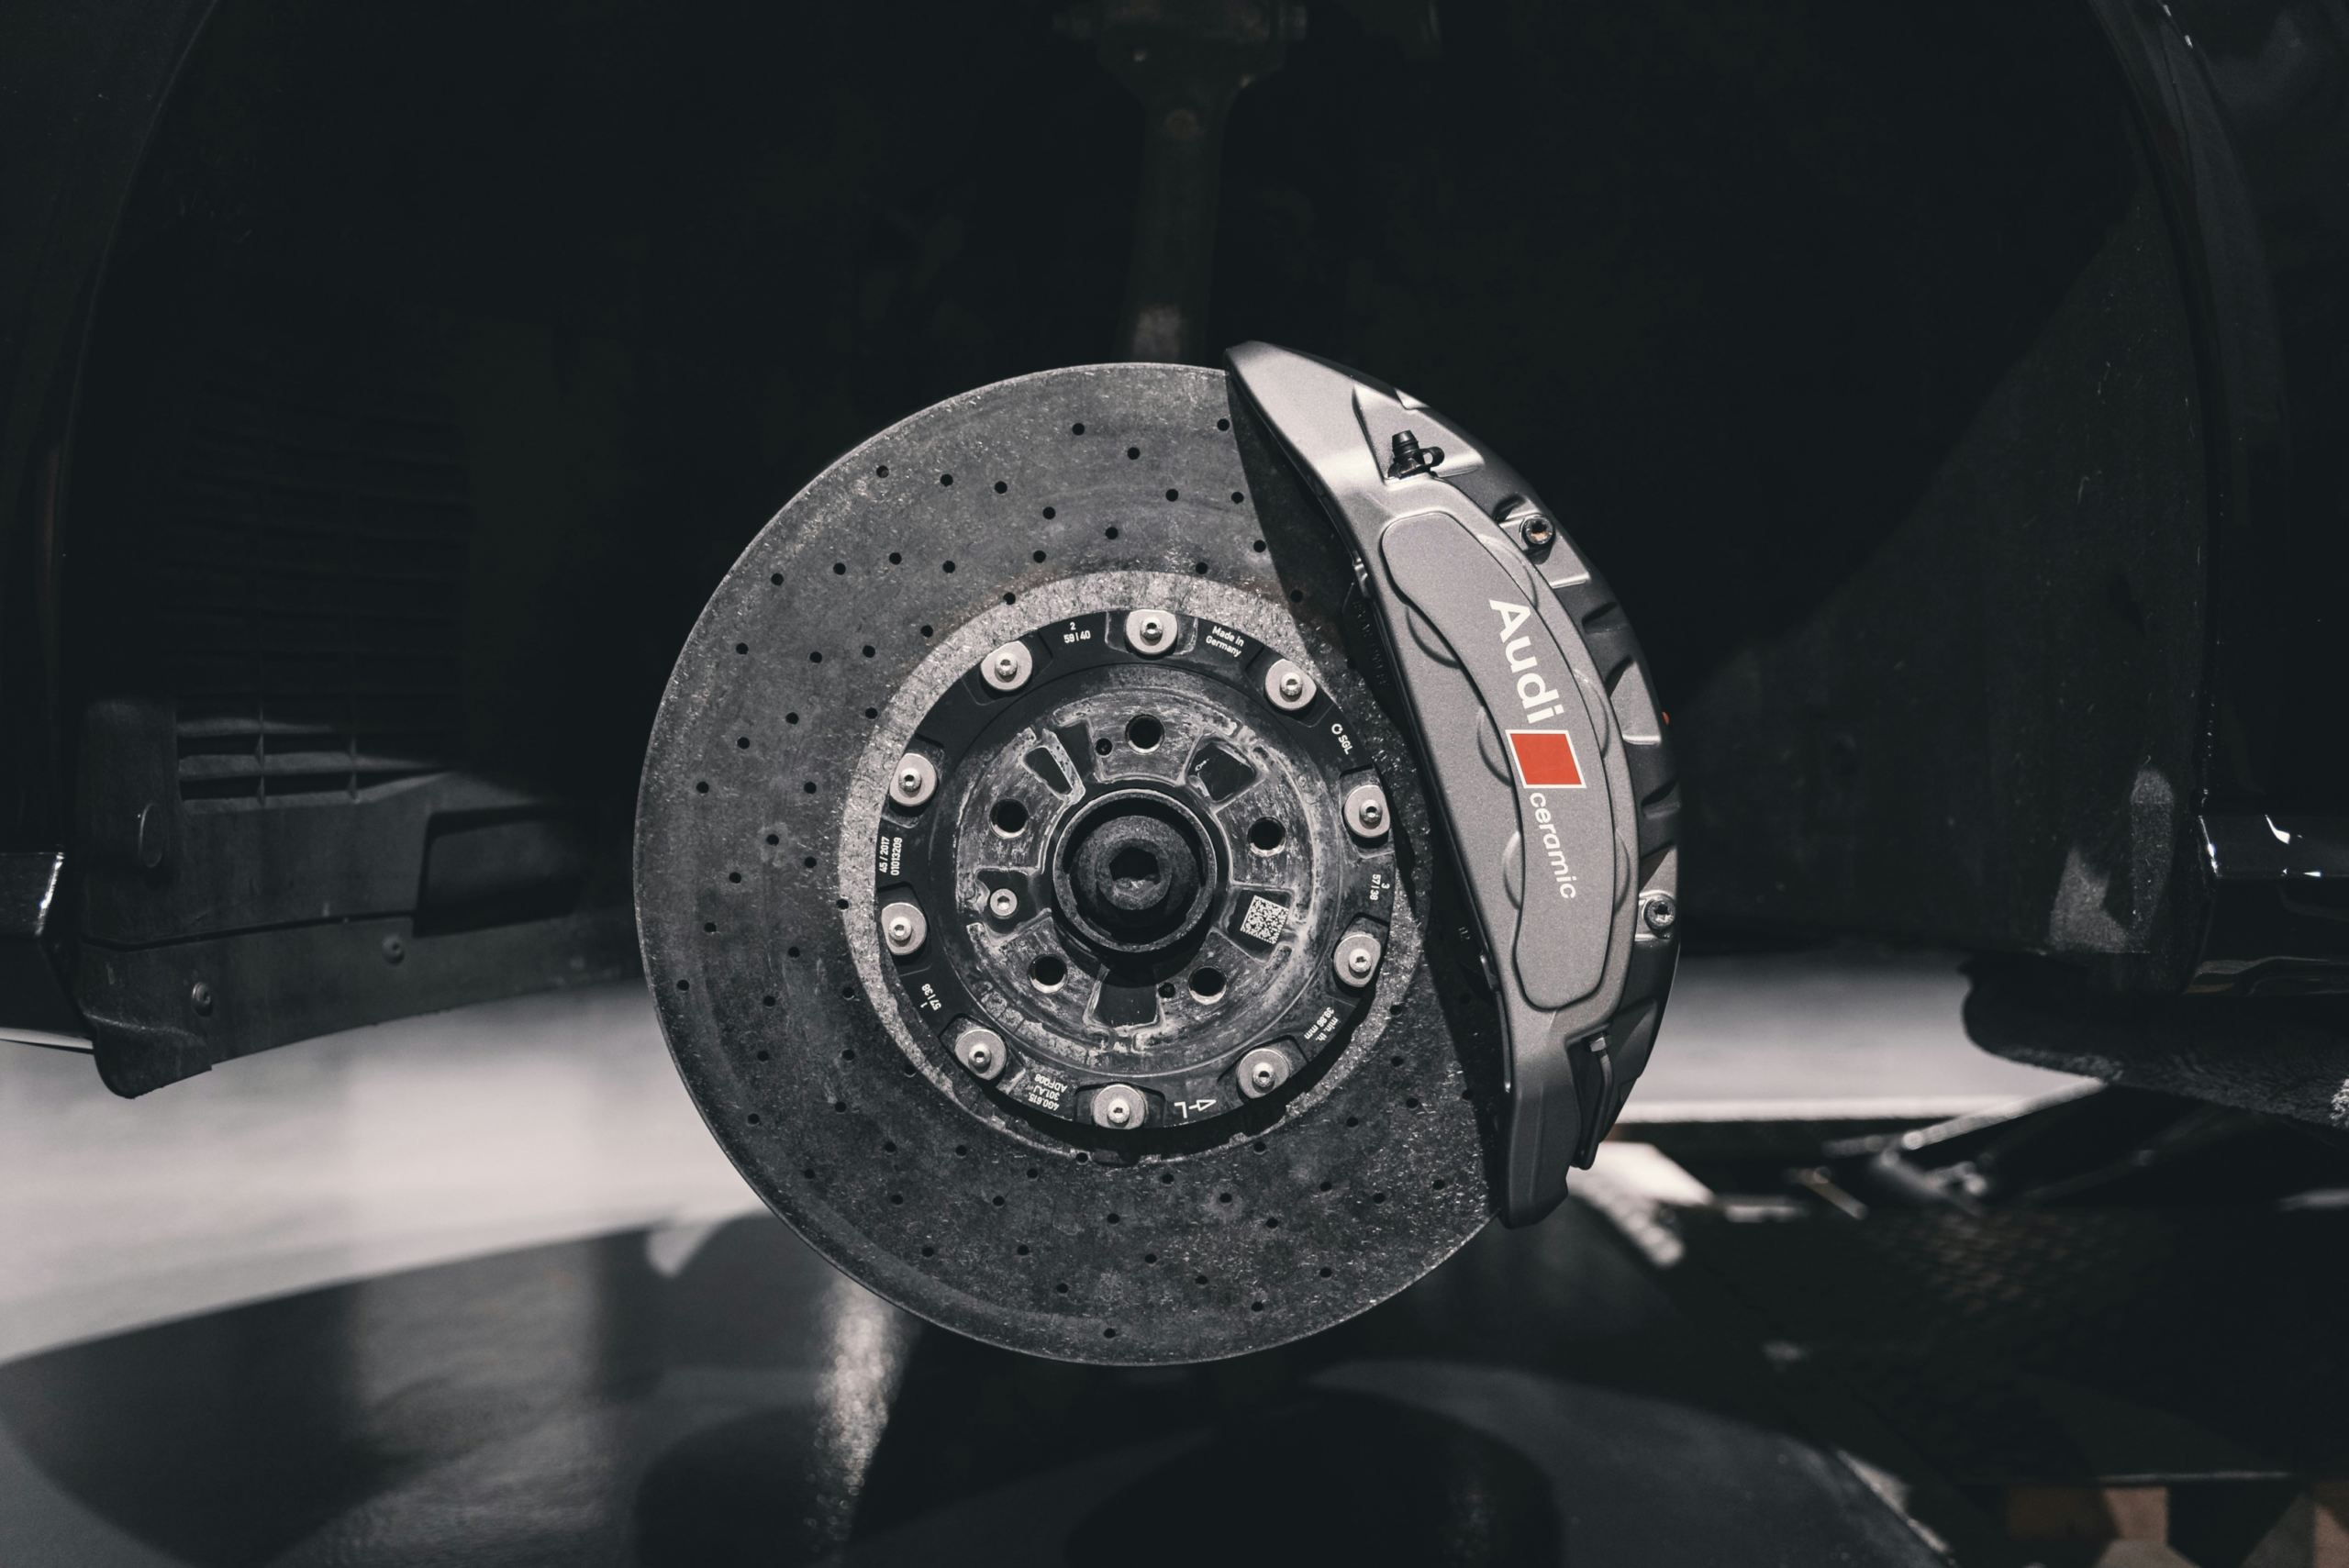
Disc brakes form an integral part of your vehicle’s brake system. They work by squeezing a spinning rotor between two brake pads in a caliper, using hydraulics to amplify the force applied from the brake pedal. The design of disc brakes promotes superior heat dissipation, making them more effective under high-stress conditions and reducing the physical effort required for engagement.
Though their initial cost is higher, disc brakes are usually easier to install and upkeep compared to other types. Essential components of disc brakes include the calipers, which house the brake pads and pistons, serving to clamp down on the wheel’s rotor to create the necessary friction for braking.
Drum Brakes

Unlike disc brakes, drum brakes function through a mechanism that causes brake shoes to press outwards against the brake drum’s inner surface, generating friction. The brake shoes, fitted with brake linings, are forced against the rotating drum when the brake pedal is pressed, leading to the vehicle slowing down or stopping.
Drum brakes offer durability benefits, thanks to their large friction contact area, which contributes to longer wear life. As they are more cost-effective to produce, drum brakes are commonly utilized as rear brakes on numerous vehicle models.
Signs It’s Time to Replace Rotors and Brake Pads
Imagine driving along, humming your favorite tune, when suddenly, your vehicle emits a squeaking or grinding sound each time you hit the brakes. This could be your vehicle telling you that it’s time to replace the brake pads or rotors. Noisy braking can indicate that brake pads are worn out or that there is metal-on-metal contact, which may also damage the rotors.
Apart from noise, poor braking performance, including a longer stopping distance and less responsive braking, often points to the need for brake pad replacement. Other signs include vibration under braking, especially felt in the steering wheel or brake pedal, which typically suggests rotor issues like warping or uneven wear.
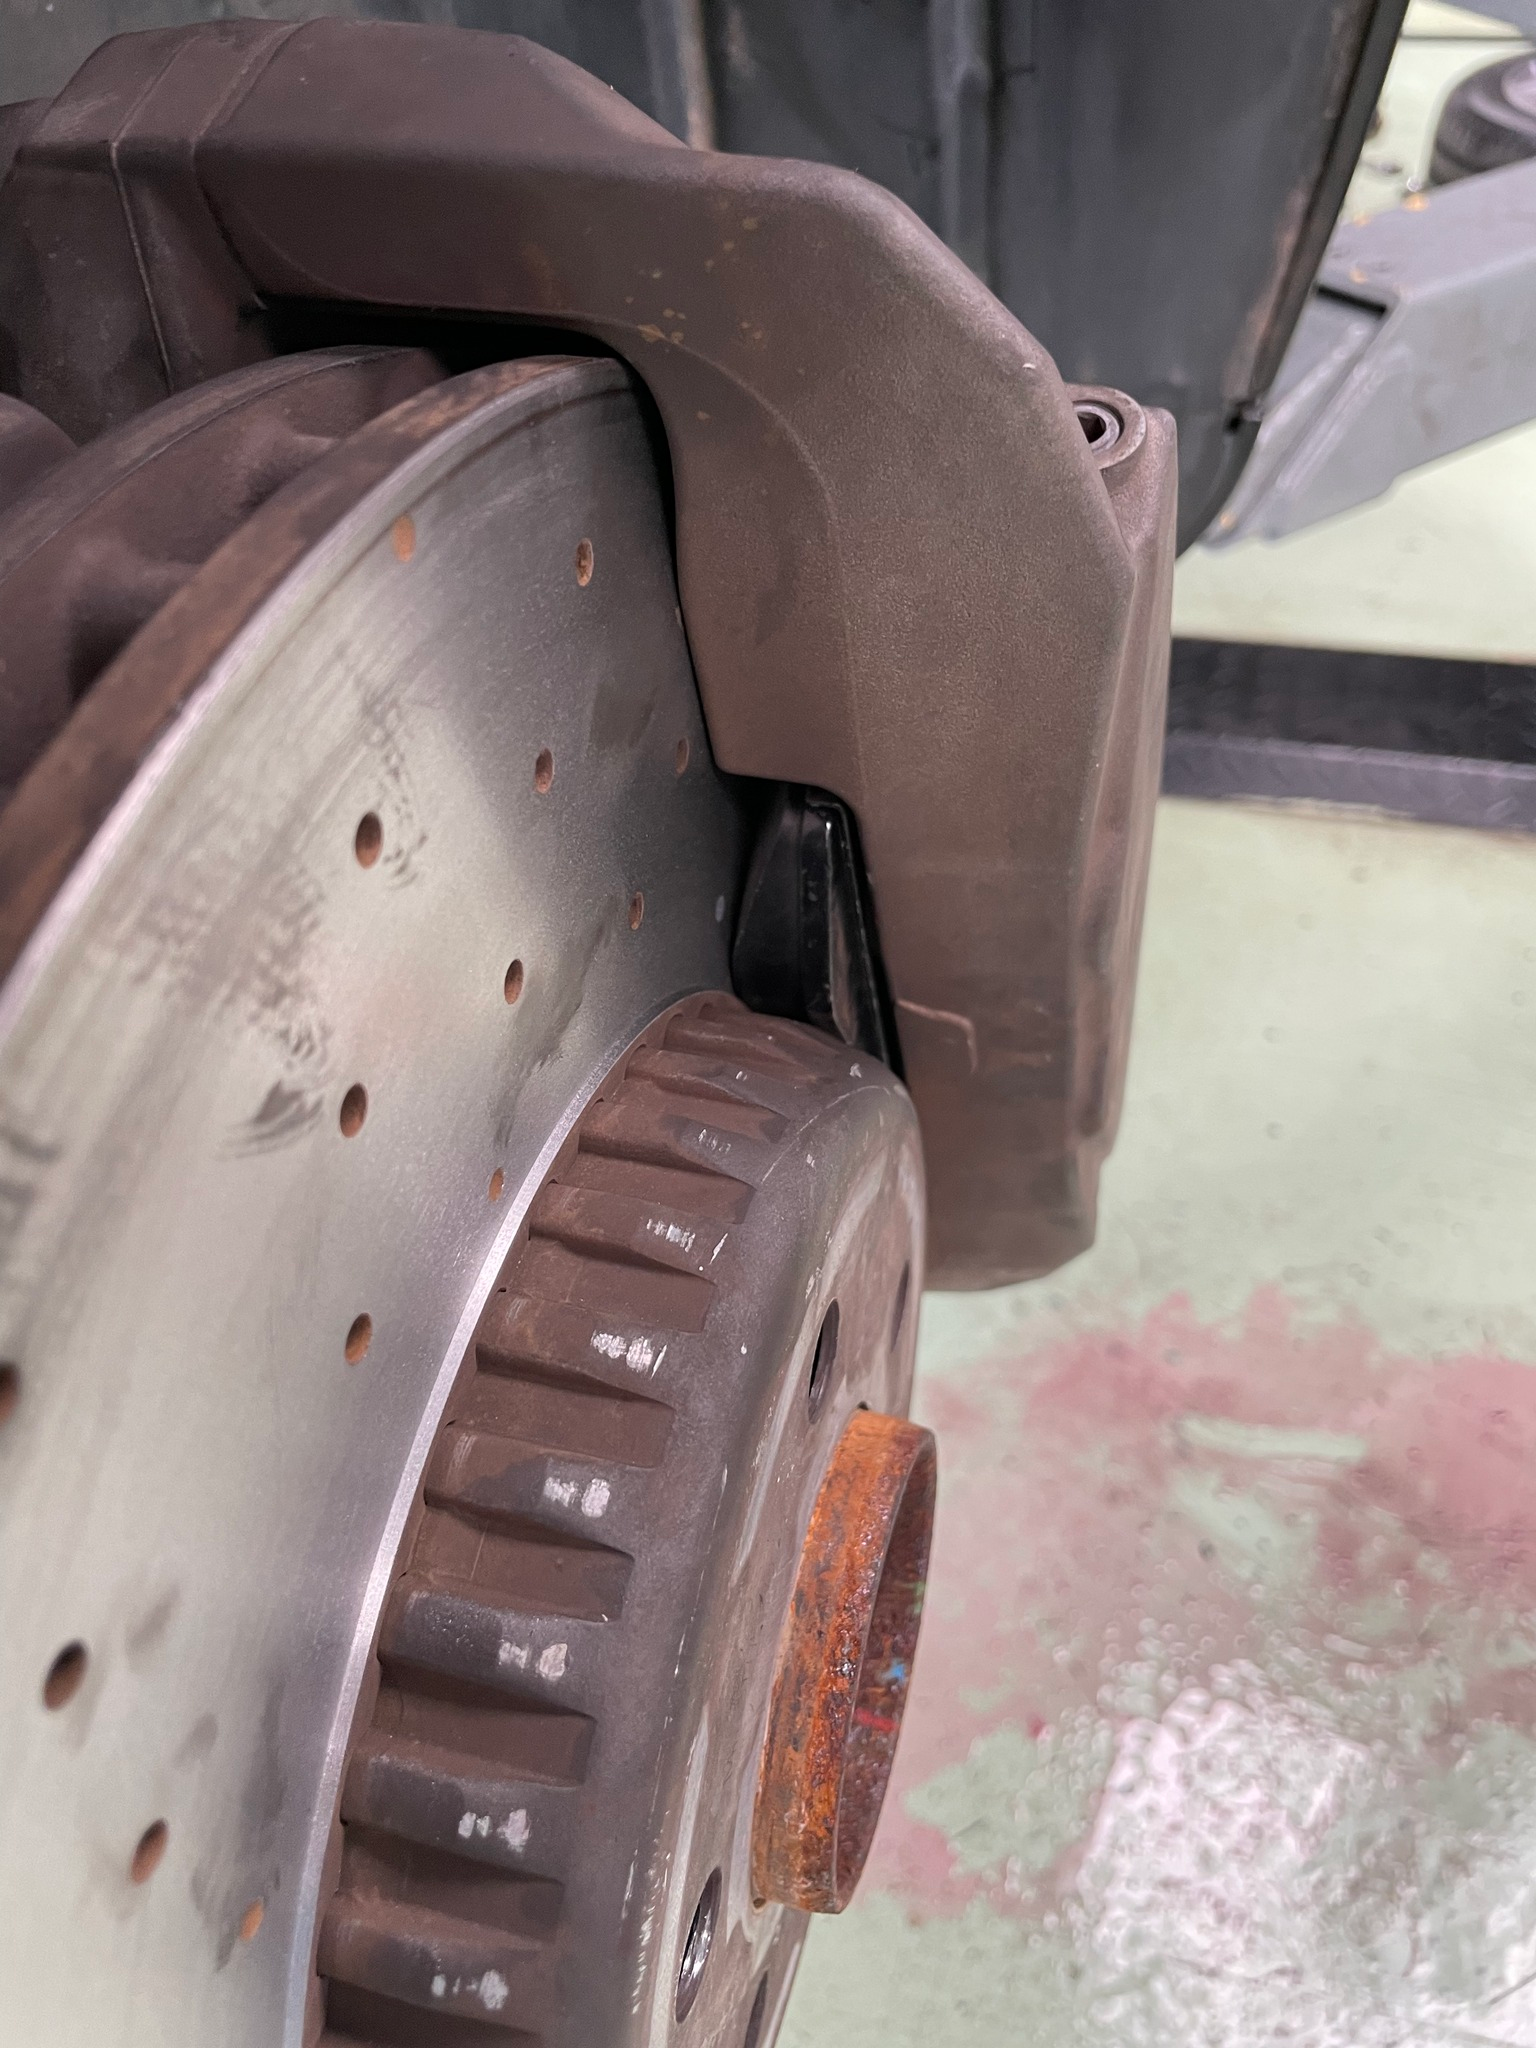
Additionally, visual signs such as blue tinting on rotors and uneven pad wear can indicate excessive heat exposure or contaminants, signaling the need for inspection and possible replacement.
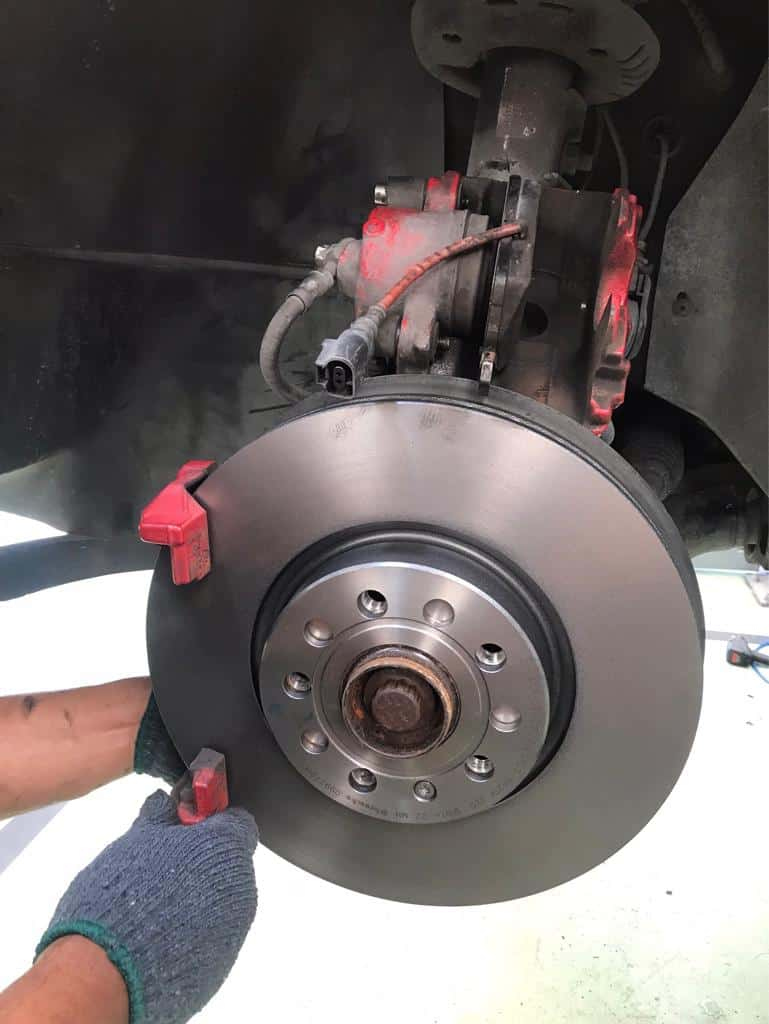
Inspecting Brake Components
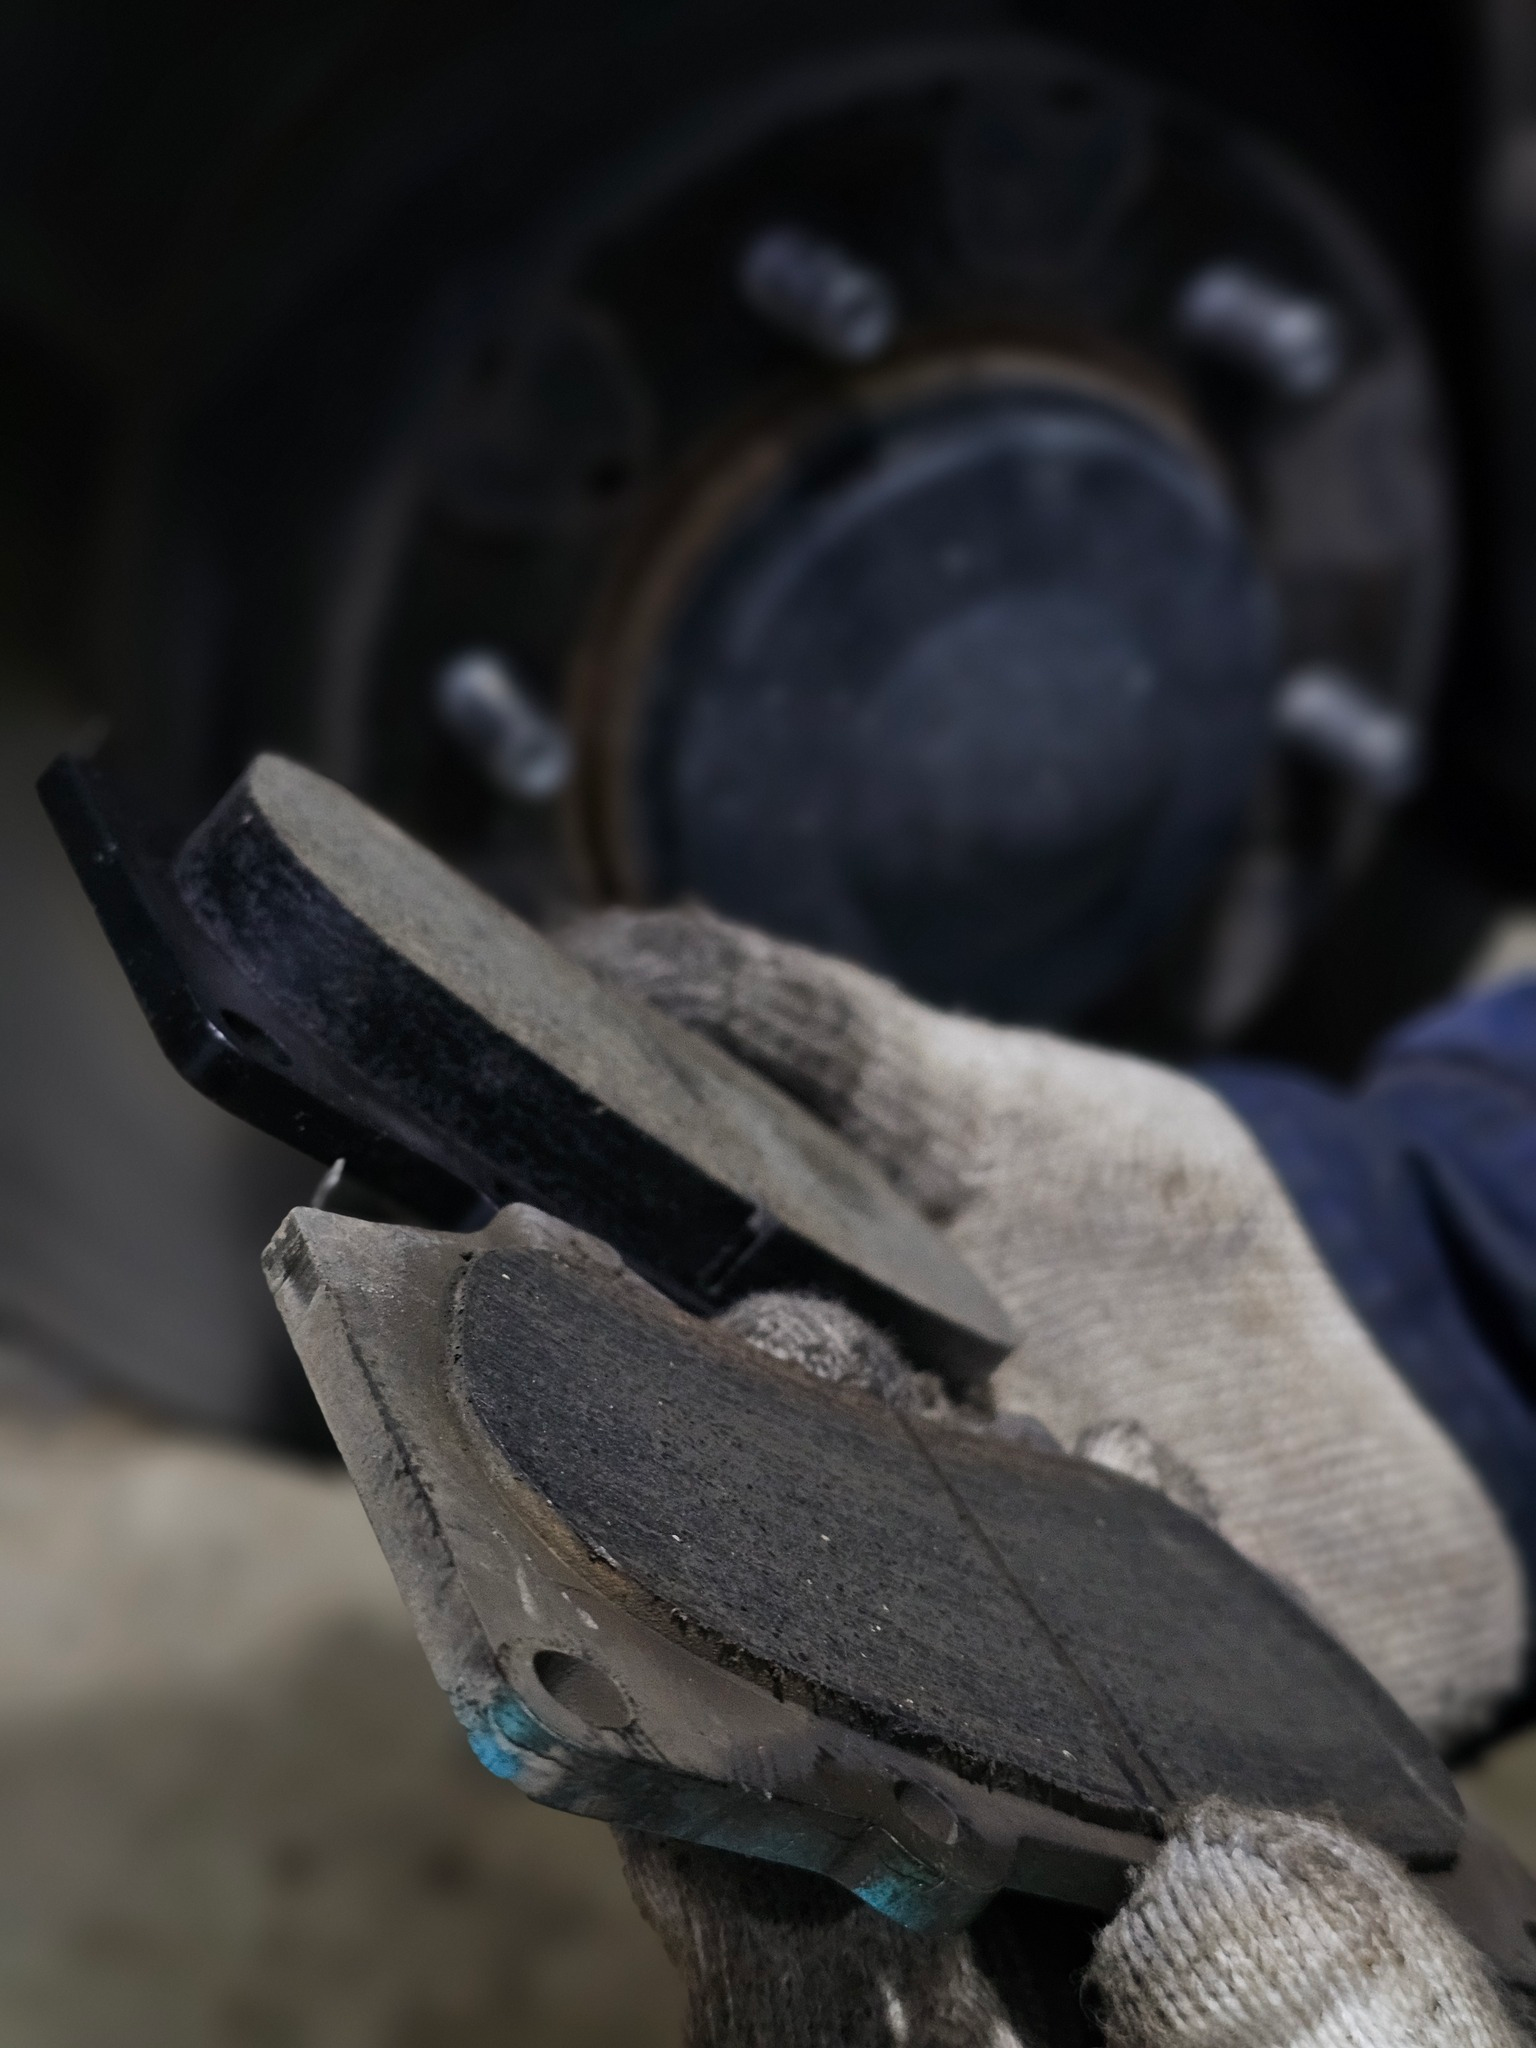
Consistently inspecting your brake components can aid in identifying potential problems before they worsen. For instance, brake pads should be replaced when they reach a thickness of 3mm and can typically be checked visually through the caliper after wheel removal. Similarly, brake rotors should be inspected for visible cracks, grooves on the surface, a noticeable lip on the edge, heat spots, and any corrosive rust that affects their structural integrity and performance.
In addition to the brake pads and rotors, brake fluid levels should be regularly checked for significant drops that may indicate leaks in the system and necessitate brake line examination. Be on the lookout for damaged brake hoses as they can cause brakes to drag, a condition associated with issues in the caliper slides and other components.
Lastly, caliper seal degradation from heat and uneven wear on brake pads can lead to changes in braking behavior, including a mushy brake pedal feel or a vehicle pulling to one side during braking.
Step-by-Step Guide: Replacing Rotors and Brake Pads
Once you appreciate the significance of brake components and can recognize signs of wear, you can begin the process of replacing rotors and brake pads. When preparing to replace these components, always prioritize safety. To prevent accidents, be sure to:
Wear safety goggles and protective gloves
Secure jack points for the jack and jack stands
Place the vehicle on solid level ground before lifting it
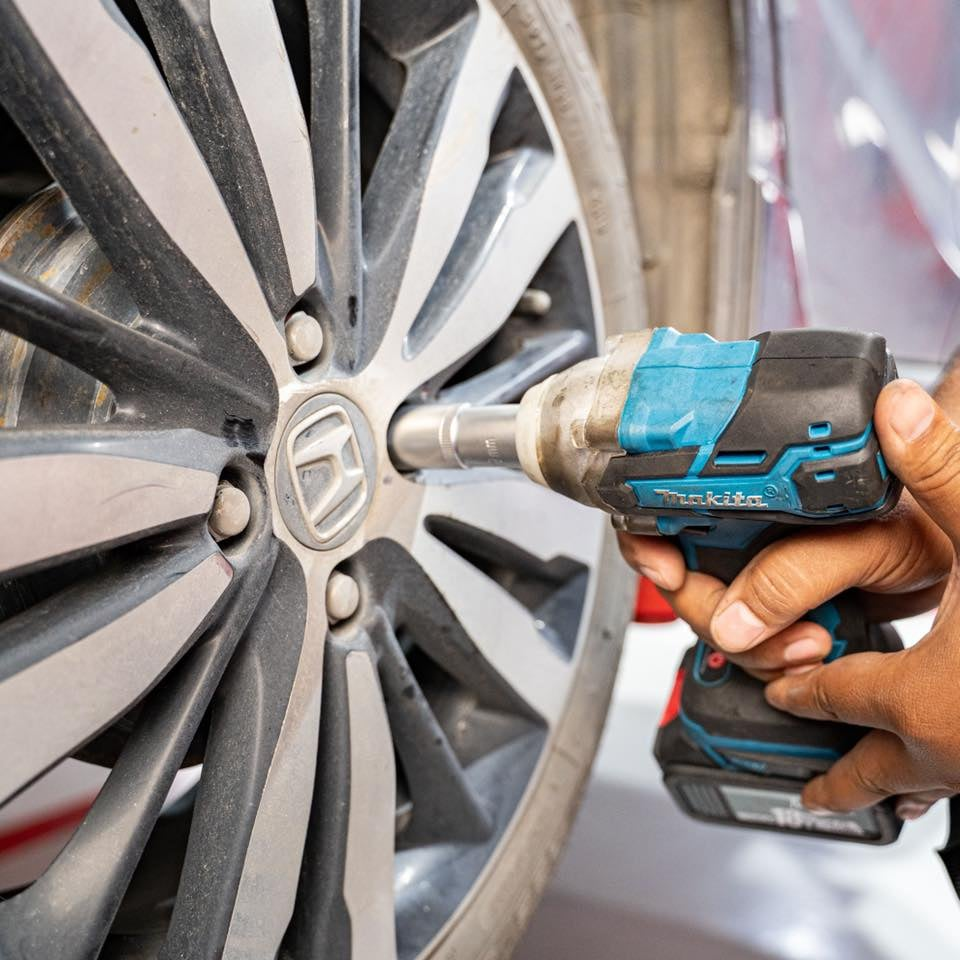
Loosen the lug nuts slightly
Block other wheels to prevent rolling
Ensure jack and jack stands are securely placed against the vehicle’s undercarriage
These precautions are important for your safety.
After the vehicle is safely raised and supported with jack stands, remove the wheel to gain access to the hub, rotor, and calipers for the removal of old brake components. Also, ensure all the required tools and supplies, such as wrenches, brake fluid, and replacement parts, are on hand prior to starting the brake replacement process.
Removing Old Pads and Rotors
The first step in the replacement process is the removal of old pads and rotors. Here’s how to do it:
Carefully lift the vehicle at its designated lifting point and secure it with a jack stand under the frame rail. Use wheel chocks behind the rear tires for additional safety.
The brake calipers are typically secured by one or two bolts. These may require a ratchet with an extension to reach. Unscrew these bolts.
Hang the caliper with a cord or wire to avoid tension on the brake hose.
If the caliper bracket is obstructing brake rotor removal, unscrew the bracket’s bolts to remove the bracket and then proceed to take off the rotor.
Installing New Brake Pads and Rotors
Once the old pads and rotors are removed, proceed with installing the new components. Here are the steps to follow:
Detach the caliper using caliper slide pin bolts.
Hang the caliper securely to prevent stress on the hose.
Compress the piston back into the caliper with the right tool.
Remove the caliper bracket bolts to release the bracket and the old hardware.
Install the new rotor on the hub, securing it temporarily with a lug nut to keep it in place.
Reattach the caliper bracket and tighten it to the vehicle’s specifications.
Replacing brake pads should always be done in pairs. Here are the steps to follow:
Fit new brake hardware.
Lubricate the ears of the brake pads before inserting them into the caliper bracket.
Apply brake grease to the brake pad backing plate.
Use the woodblock and ‘C clamp method to push the piston back into its housing if needed.
Adjust the caliper assembly at this stage.
After this, clean and lubricate the caliper bracket slide pins, reinstall the wheel and tire, lower the vehicle ensuring all bolts are properly fastened, check for wear or damage on bolts, guides, and rubber boots; and finally, after refitting the wheel, lower the car and secure the lug nuts.
Bleeding Brake Lines and Checking Brake Fluid
Bleeding the brakes when retracting caliper pistons can prevent brake fluid overflow. Use a bleeder valve to drain the fluid into a container. Remember, air in the brake system can lead to a spongy or soft brake pedal, which necessitates bleeding the brakes to ensure proper function. A soft brake pedal post-replacement may signal unresolved issues with air in the brake lines or the master cylinder. It’s essential to check the caliper piston as well to ensure optimal performance.
For a proper brake fluid flush, which removes contamination from the system, utilize specialized equipment. Open the car hood and check that the brake fluid reservoir is full before commencing work on the brakes. To prevent spills, you can use a turkey baster to draw out any excess brake fluid from the master cylinder reservoir. This will help keep the area clean and safe during maintenance..
After completing the brake job, ensure to:
Check the fluid level before pressing the brake pedal to set the new pads
Top off the fluid as needed
If the brake fluid is dark or unclear, which indicates contamination from internal brake system components, replace the brake fluid during bleeding.
Preventive Maintenance for Brake Systems
A stitch in time saves nine, and this couldn’t be truer for brake system maintenance. Consistent maintenance ensures optimal brake condition, longevity, and saves you from expensive repairs. Conducting a full system bleed periodically maintains braking performance and extends system longevity.
Brake fluid maintenance tips:
Regularly bleed the brake fluid to prevent moisture buildup
Periodically draw out old fluid from the reservoir and refill with new fluid to prevent contamination
Replace brake pads regularly upon signs of wear to maintain a clean system and preserve the rotors.
Regular Inspections
Frequent inspections constitute a crucial element of preventive maintenance. By identifying issues like brake fluid leaks, worn-out brake pads, or damaged rotors during inspections, potential brake failures can be prevented. Brake inspections contribute to overall vehicle safety by ensuring the braking system is reliable and helps in responding quickly to unexpected situations on the road.
Regular inspections can extend the lifespan of the brake system and save money by preventing further damage to components. Regular brake inspections allow for the assessment of brake pads, rotors, and calipers, addressing wear and tear to maintain optimal brake performance. Inspections provide peace of mind, knowing the braking system has been professionally checked and is in good order, which reduces stress while driving.
Proper Driving Habits
Frequently, your brake system’s longevity depends on your driving habits. Proper driving habits can greatly reduce wear and tear on brake components, thus extending their lifespan. Gentle, consistent pressure on the brakes can significantly impact the longevity of brake components and lead to longer-lasting use.
Aggressive driving and hard braking can cause increased wear and tear on brake components, often necessitating earlier replacement of parts such as rotors. Anticipating stops by planning ahead and decelerating in advance allows the engine to reduce some of the load on the brakes, preserving their condition. Moreover, maintaining a safe following distance, such as following the three-second rule, can reduce the need for frequent braking, resulting in less strain on the brake system.
When to Consult a Professional Mechanic
Even with routine maintenance and inspections, situations may arise that necessitate a professional mechanic’s expertise. If the brake light on the dashboard comes on, indicating that brake pads may need replacement, a professional mechanic should inspect the system for any issues with brake fluid, parking brake, or potential system malfunction.
Due to the complex construction of drum brakes with many components, it’s advisable to seek out an expert mechanic for repairs to ensure they are carried out correctly.
Saving Money on Brake System Repairs
Although inexpensive brake parts may be tempting, bear in mind that quality often matches the price. Selecting the right brake parts should involve assessing warranty and expected lifetime, not solely on the price, ensuring an optimal balance between cost and longevity.
This can save you money in the long run, not to mention ensuring your safety on the road.
Common Brake System Myths Debunked
Numerous myths circulate about brake systems, and debunking them can enhance your understanding and maintenance of your vehicle’s brakes. One common belief is that rotors warp from heat, but this is a misconception. Uneven pad deposits or the presence of heat spots are often misinterpreted as warping.
Another myth is that wet pads compromise braking performance. In reality, modern disc brakes effectively dispel water due to centrifugal force, and wet pads typically do not compromise braking performance to a significant degree.
Also, unlike high-performance racing pads, which need to be warmed up to deliver optimal performance, street brake pads are designed to provide consistent brake torque even at low temperatures.
Summary
In conclusion, maintaining your vehicle’s brake system is crucial for your safety and that of others on the road. Regular inspections, understanding when it’s time to replace brake pads and rotors, and knowing how to replace them are all critical aspects of this process. Debunking common myths and following recommended preventive maintenance can further help prolong the life of your brakes and save you money. Remember, when in doubt, consult a professional mechanic. After all, smooth braking isn’t just about the journey; it’s about arriving safely.
Frequently Asked Questions
How much does it cost to replace worn rotors?
Replacing worn rotors can cost anywhere from $150 to $300 per axle for the parts, with an additional $150 to $250 for professional labor. Higher-quality rotors may cost a bit more, and labor at a shop usually adds another $150 to $200 per axle.
How do you know if your rotors are bad?
If your rotors are bad, you may notice signs like squeaking, squealing, or grinding sounds when applying the brakes, as well as vibration or pulsation in the steering wheel, and shaking of the steering wheel. These symptoms indicate potential issues with the rotors.
Do I need to replace my rotors when I replace my pads?
It’s not always necessary to replace rotors when replacing brake pads. The decision depends on the condition of the rotors, which should be evaluated by a mechanic. If they are warped or worn beyond the minimum discard thickness, it’s recommended to replace them alongside the brake pads.
How often should I replace my brake pads?
You should replace your brake pads when they reach a thickness of 3mm. This can be checked visually through the caliper after wheel removal.
How can I maintain my brake system?
To maintain your brake system, regularly inspect it, apply gentle and consistent pressure on the brakes, anticipate stops by planning ahead, and decelerate in advance. These practices will help ensure the proper functioning of your brake system.